How to Create Embellished Felt Tags for Gifts, Organization and More!
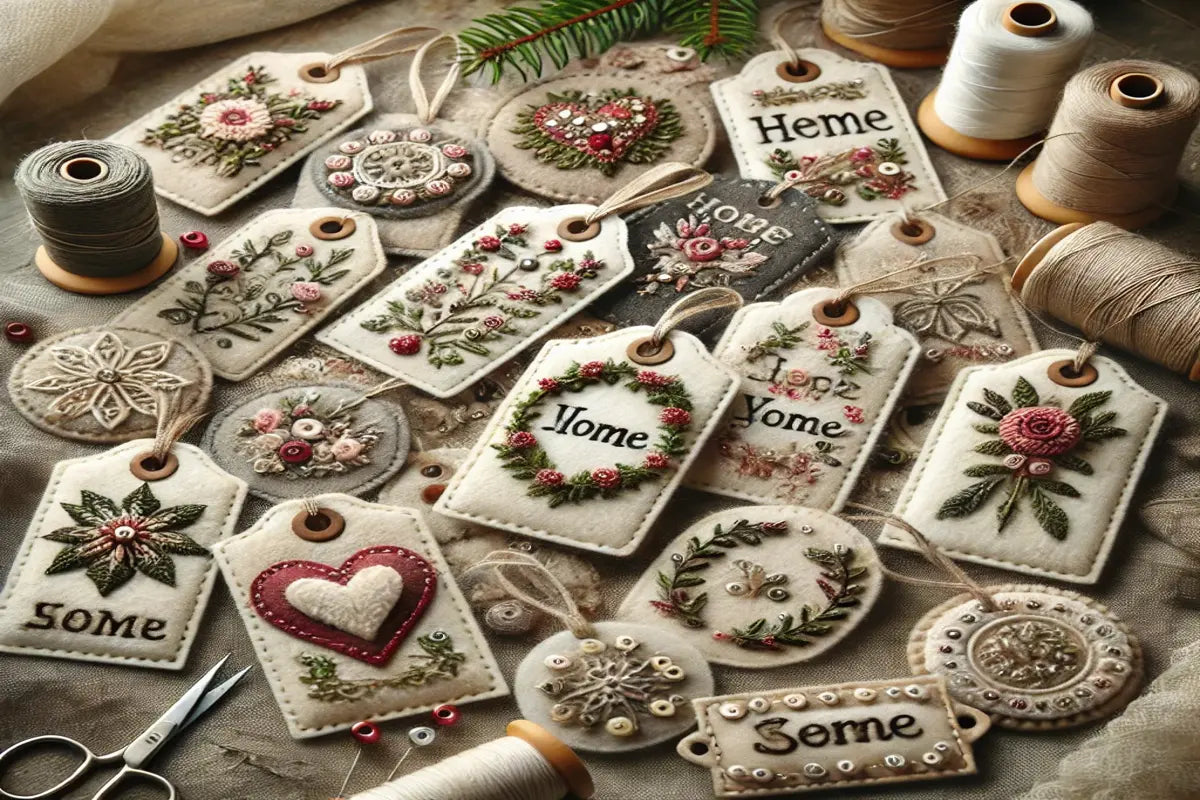
Adding a personal touch to gifts, storage bins, or special keepsakes has never been easier with embellished felt tags! These DIY tags are not only stylish but also versatile and fun to make. Whether you're decorating presents, labeling baskets, or crafting custom tags for a special occasion, felt offers a durable and aesthetic canvas for creativity.
In this guide, we’ll walk you through how to make beautiful felt tags with embroidery, beads, and other embellishments to elevate your crafts!
Materials You'll Need:
✔️ Felt sheets (choose colors that match your theme)
✔️ Embroidery floss (contrasting or complementary shades)
✔️ Needles (embroidery and regular sewing)
✔️ Scissors (or a rotary cutter for precision)
✔️ Hole punch or eyelets (for attaching ribbon or twine)
✔️ Decorative elements (beads, sequins, fabric paint, buttons)
✔️ Glue or fabric adhesive (optional for extra embellishments)
✔️ Ribbon, twine, or string (to attach the tag)
✔️ Chalk or disappearing fabric marker (for marking designs)
Step-by-Step Guide to Making Embellished Felt Tags
Step 1: Cut Out Your Tag Shape
Decide on the shape of your felt tag—rectangles, circles, hearts, or even custom shapes like stars and flowers. Cut out the shape using sharp scissors or a rotary cutter for a clean edge.
✂️ Tip: Use a stencil or cookie cutter to trace perfect shapes before cutting!
Step 2: Add an Opening for Attachment
Punch a hole at the top of the tag using a hole punch or install a small metal eyelet for added durability. This is where you’ll thread your ribbon or twine later.
📌 Alternative Idea: If you don’t have a hole punch, simply sew or glue a loop of felt at the top!
Step 3: Embellish with Embroidery
Now comes the fun part—decorating! Use embroidery stitches to add names, initials, floral patterns, or festive designs.
🧵 Easy Embroidery Ideas:
- Backstitch for simple lettering
- French knots for polka dots or flower centers
- Lazy daisy stitch for delicate florals
- Blanket stitch around the edges for a finished look
🌟 Personalization Tip: Stitch the recipient’s name or a short message like "Merry & Bright" or "Handmade with Love."
Step 4: Add Beads, Sequins, or Other Decorations
To give your felt tag a pop of sparkle, sew on beads, sequins, or buttons. These small touches can add elegance, whimsy, or a festive vibe.
✨ Ideas for Embellishments:
- Tiny pearls for a sophisticated look
- Bright sequins for holiday tags
- Cute buttons for a playful theme
Step 5: Attach Ribbon or Twine
Thread a piece of ribbon or twine through the hole and tie a knot or bow. This makes it easy to attach your tag to gifts, baskets, or décor items.
🎀 Styling Ideas:
- Use satin ribbon for a luxe look
- Go rustic with jute twine
- Try patterned fabric strips for a unique touch
Creative Ways to Use Your Felt Tags
✔️ Gift Tags – Personalize presents for birthdays, holidays, and special occasions.
✔️ Organization Labels – Attach to storage bins, baskets, or jars for a stylish and functional touch.
✔️ Luggage Tags – Sew your name onto a tag and tie it to your travel bag.
✔️ Holiday Ornaments – Add a loop to turn them into festive decorations for the tree.
✔️ Bookmark Tags – Punch a hole at the top and attach a long ribbon for a cute handmade bookmark!
Final Thoughts
Creating embellished felt tags is a simple yet creative way to add charm and personality to everyday items. Whether you're making them for gift-giving, organizing your home, or crafting keepsakes, these tags offer endless possibilities!

